Table of Contents
This is a guide to building your own incubator for chicken eggs. Read this article to learn more about how to raise chickens.
What You’ll Need
- A large Styrofoam cooler (large enough to easily fit a dozen-egg carton on the inside of it).
- A clip-on electrical light (the kind with a wide, saucer-shaped base)
- A 75-watt light bulb
- Aluminum foil
- A dozen-egg carton
- A thermometer
- A hygrometer
- Glue
- A paintbrush
- Scissors


Putting Everything Together
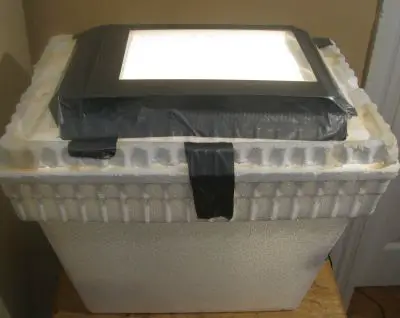
- Remove the top of your cooler. Use your scissors to cut a hole into the center. It should be a size that your electrical light will fit into snugly, so it stays in place. Your light should fit deeply enough so that your light shines directly into the inside of your cooler.
- Combine your glue with water to create a 50/50 mixture. Take your paintbrush and apply your glue mixture to the DULL side of your aluminum foil.
- Apply your foil to the inside of your cooler like you would with wallpaper – tight and smooth. You should have your foil (SHINY side out) applied to all the inner surface of your cooler, as well as its top (minus the hole for the light). Let it dry overnight.
- Cut the top of the egg carton off. You now have 2 half-trays you can now use with your incubator. Insert one of them into your cooler.
- Screw the 75-watt light bulb into your electrical light.
- Place the thermometer at the bottom of your egg carton.
- Return the top of your cooler, and turn on the electric light. After an hour, check the temperature on the thermometer. You want the temperature of your incubator to be between 95oF and 100oF, if it isn’t you’ll need to change your light bulb. If it’s too hot use a lower wattage bulb, if it’s too cool use a higher wattage.
Using the Incubator
To use the incubator:
- Remove the top of your cooler.
- Place your eggs into one of your egg cartons, with the large rounded end upright, and place them inside of your cooler.
- Return the top of your cooler, and turn on the electric light.
- Check the temperature regularly, to make sure it’s within the 95-100oF range.
- Turn your eggs 4 times a day, 90 degrees each time. Your eggs should end in the position they started in.
- Once a chick has hatched and is peeping, place it into a brooder. Any egg not hatched after a month should be gotten rid of. Clean your incubator before starting a new round of incubation.
Make sure you have a few small openings for air to flow into and out the incubator. You need some way for air to enter and escape, but make sure they aren’t too big so that you maintain the hot, humid atmosphere.
You’ll want the humidity between 60-75%. Consider getting a hydrometer, and if the humidity is too low adding a small cup of water which will naturally evaporate increasing the humidity.
I hope you’ve now known how to build your own homemade incubator.